Wednesday, January 31, 2018

Have a Wonderful Day!

Welcome friends to another fun filled day with creative magic from heartfelt creations. You must have seen the Singing in the rain collection with some garden fairies and witty lovely images. Today I have another such creation using the same collection.


Instructions

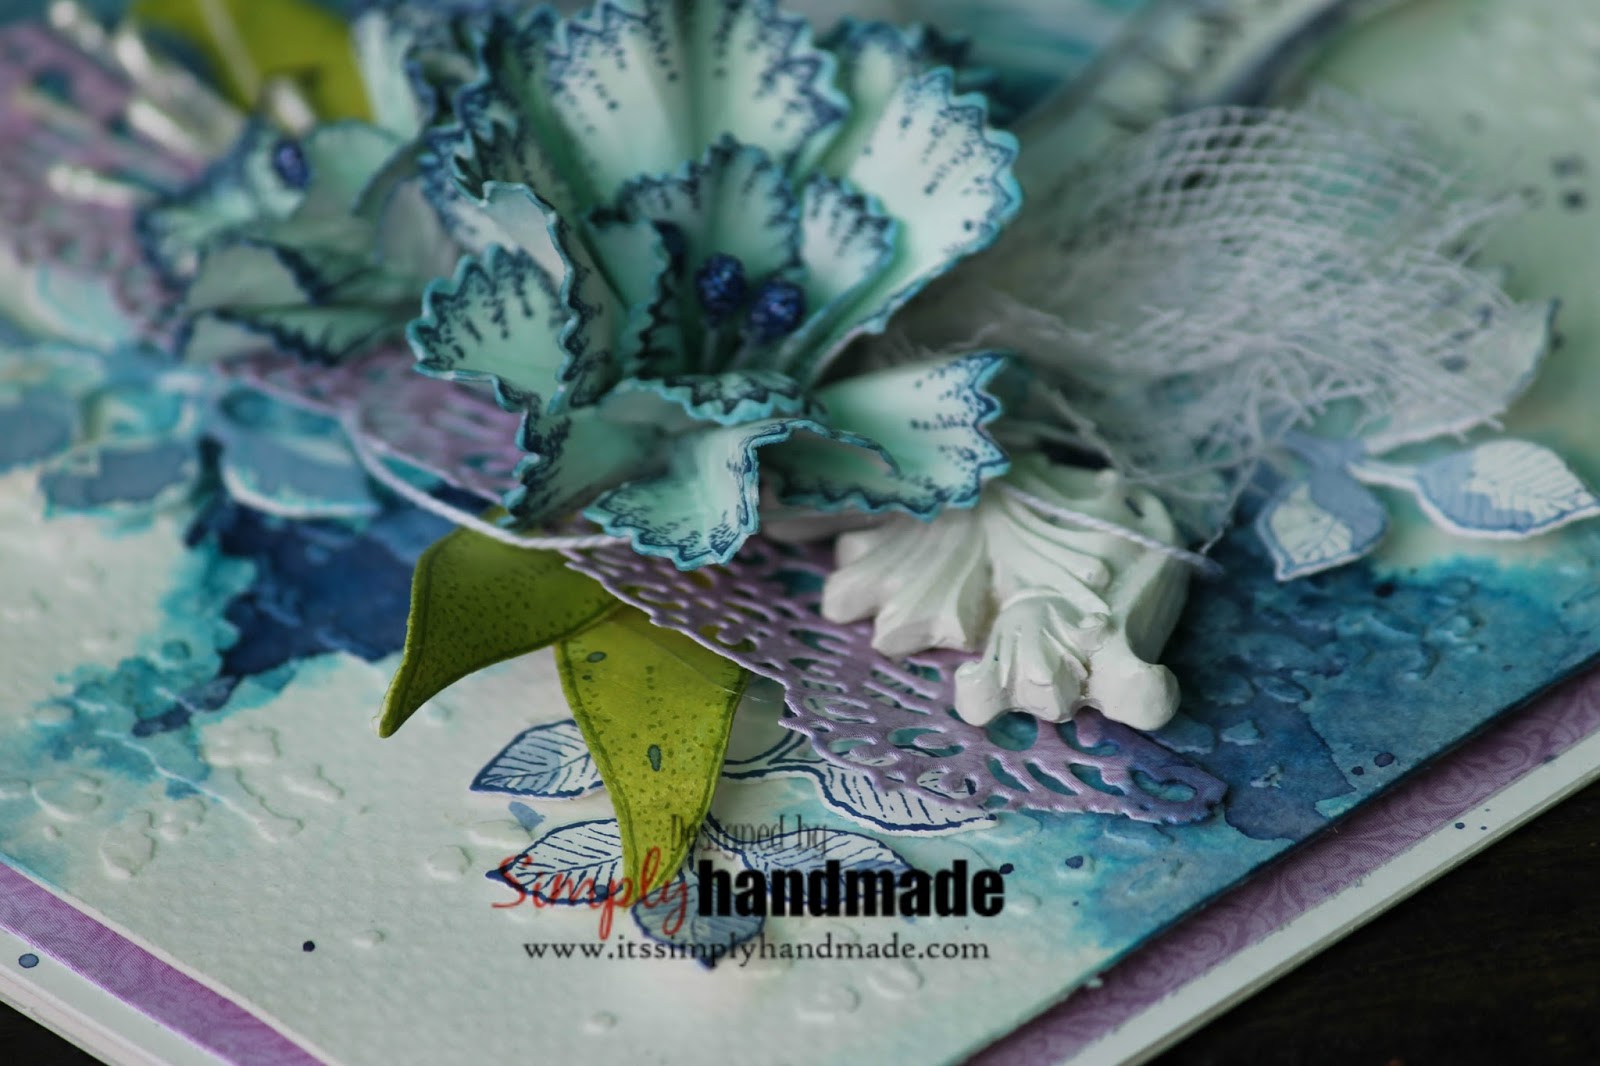
This card measures 6”x4.5” and has a lace window. It shows a Garden fairy wishing us a wonderful day. To create this card score and cut a white card stock at 6”x4.5” which will form the card base. Take a dark blue pattern paper from the paper collection and cut it at 1/8” less than the card base. Choose another lighter shade of blue pattern paper and cut it as further 1/8” less than the second layer. Adhere all these layers together which will form the card base on which the lace window is build.To create the lace window die cut a white card stock using the decorative medallion die from the classic Wedding collection. Choose a pattern paper which will depict a garden scene from the paper collection and die cut an oval window using the eyelet Oval and basics large Die.Die cut another decorative oval piece to embrace the lace window.Once all die cut adhere the lace window and the oval window pattern paper and then adhere to the card base using a foam tape.For the garden fairy, stamp the image using black archival ink onto a white card stock and then color it using Zig brushes. Stamp and die cut few of the smallest carnation flower using plum and black archival ink. Once die cut color them using the zig brushes. Shaped them using the ball tool and then pierce the center to finish them with a stamen. These small flowers will embellish the fairy and the branches. In order to fill the branches and bush stamp and die cut a piece of classic petunia bouquet die and color them using the zig brushes. Also stamp and die cut a leafy branch from Young at heart collection using the Simply Classic stamp and die set.In order to assemble the card, place the fairy on a dimensional adhesive and then place all the small flowers, twigs and branches. For the sentiment stamp the word “ Have a wonderful Day” from the Hearfelt love collection using black archival ink onto a write card stock. Once stamped die cut using the smallest oval die. Punch a whole on both side of the die cut piece and run some cotton thread. Place the sentiment at the bottom. Finish the card with some frosting white powder and some crystal clear on the sky.

Supplies


HCDP1-286 Singing in the Rain Paper Collection
HCPC-3810 Songs of Spring Cling Stamp Set
HCD1-7168 Songs of Spring Die
HCPP1-438-2 Paper Pack of 10 - White
159723, Designer Dries clear Adhesive
352854, Glue Tips - Metal
HCDA1-450Stack and Store Daubers- Pack of 6
  

Saturday, January 27, 2018

Happy Valentine!

Welcome friends to another post where I have played with a bright color palette and with not so traditional valentine color. Yes its not red , pink or black. This card is made using Mudra Cut3 dies which were recently released.


To create this card die cut several pieces of the Gardenia set from plain white foam. Using distress ink or Archival ink you can shape the flowers and the leaves. Once colored hold it against a hot press at mild settings you will see the petals curling on its own. Its a natural process and we can choose to either keep it that way or tweezers it all the more to get the desired shape. Pierce the center to fill in the center stamen.To create the background I have used distress oxide and splash of water to create a mild cyan background. Once the background is created place all the leaves and flowers that are shaped. Stamped the sentiment " I love you" with archival black ink on a white card stock and clip with a small wooden clip. Stick the same on the center tucking in to the flower bouquet center.To finish the card add some splashes of white gesso and cyan distress ink.

Let me know your thoughts and how you liked it. I will soon be back with some more fun and creative projects.

Love XOXO

Thursday, January 25, 2018

Water Color Camellia!

Friends I am back with another card for heartfelt creations using the Camellia Carnations flowers.This card has lot of stencils in the background, colors dripping and then the vibrant camellias.


Instructions

The final card measures 6” x 4.5”. Start by scoring and cutting a Black card stock that measures 4.5”x12”, score at 6” and create the card base. Cut a 5.8”x4.3” white card stock and distress the sides using black soot distress ink. For the front card base take a water color paper which measures 5.5” x 4.1”.Take any stencil of your choice and create a stencil background using some texture paste. Heat set and sprinkle some water to wet the surface. Later on an acrylic block splash some black soot distress ink to splash the stenciled background. Once you receive the desired look heat set the surface.Stamp and die cut some large and small Carnation by stamping using Vermillion Archival Ink. Color the flowers using sunflower and shape the petals using 3D basic flower shaping molds. Shade the leaves using the crushed olive distress ink. Stamp and die cut some filler leaves using the black soot and keep it white.To arrange the bouquet, use some cheese cloth, pearl stamens and leaves assemble all the shaped flowers and leaves. Tuck in the die cut holiday filigree at the bottom of the flower bouquet. Sprinkle some black soot on the the white surface.To finish the card tuck in the Congratulations Sentiments. 

Let me know how you like it! Untill then have a crafty feast!


Wednesday, January 24, 2018

Singing in the Rain with an embellished Umbrella!

Hello friends, its heartfelt Wednesday and I am with a project featuring the fun witty yet elegant Singing in the rain collection.Today's card is a fancy and creative imagination of how about having a umbrella that looks beautiful with some droplets of rain, hanging teeny weeny flowers and some birds hanging around. It will definitely be a beautiful moment.


Instructions

It’s a single layer card with elements attached on the front panel of the card. Start by taking a white card stock folded and measuring at 6.5” x 4.5”. It has 2 layers so cut the first layer at 1/8” less than the card base and the second layer at 1/8” less than the first layer. Both the layers are formed using pattern paper. Choose the umbrella image from the stamp collection and stamp it on a white card stock using black archival ink.Color the stamped image using Zig brushes. Similarly stamp the little birdie image and the branches using Archival Black ink on a white card stock. Color all the stamped images using Zig brushes. Also stamped some sunflower images from the beary fun collection and colored the images using Zig brushes.Once all the images are colored, die cut all the pieces using the coordinating dies.Using a mini mister spray and damp the images to a little extent. Later using one of the ball tool shape the leaves, birds and the umbrella to make it look protruded. This will help create a dimensional look to the images.

Supplies

HCD1-7169 Rain Boots and Blossoms Die
HCPC-3809 Singing in the Rain Cling Stamp Set
HCPC-3812 Raindrop Sentiments Cling Stamp Set
HCDP1-286 Singing in the Rain Paper Collection
HCD1 – 7161 Sweetheart Borders Die
HCD1-7167 Singing in the Rain Die
HCD1-7168 Songs of Spring Die
HCD1-7161 Sweetheart Borders Die
HCPC-3812 Raindrop Sentiments Cling Stamp Set
HCPC-3810 Songs of Spring Cling Stamp Set
HCPP1-438-2 Paper Pack of 10 - White
159723, Designer Dries clear Adhesive
352854, Glue Tips - Metal
HCDA1-450Stack and Store Daubers- Pack of 6

I would love to hear from you what fancy umbrella you would want to have. Let me know how you liked this card. Will be back soon with another creative inspiration.


Wednesday, January 17, 2018

I love You + Happy Valentine

Hello Friends, yes we are gearing up to celebrate Valentine's day pretty soon. Its time we pick up our scissors and some flowers to create some beautiful handmade cards and gifts for our loved ones. 

This week I created a card using the Heartfelt Love collection. Its a very pretty collection , amazingly designed so that you can celebrate your loved ones perfectly.


Instructions

The final card measures 5.5” x 4.25” and its created in a clean and simple format with intricate die cutting. Take a white card stock and cut and score it at 5.5”x4.25” to form the card base. Cut a pattern paper from the Heartfelt love paper collection at 1/8” less than the card base and adhere to the card. Take the second largest eyelet heart die and die cut the front card panel. Using a 5”x4”white card stock die cut using the designer square from the Gift of love box die.Adhere the intricate die cut piece at the heart window which will form the card front panel. Stamp several branches from the banner of love sentiment using black archival ink from a water color paper. Color the bouquet using zig brushes and a water color brush and then die cut the pieces. Stamp and die cut several petals of the dogwood flower from white card stock and plum archival ink. Shade them using plum, sunflower archival ink. Mist them and shape them. Glue them together and finish the flower by some center prills.Once the die cut pieces are ready and the flowers, arrange the bouquet around one side of the die cut heart window. Tuck in some small flowers and end the card with a stamped “ I love you “ sentiment for the perfect valentine day card.

Supplies

HCPC – 3804 Heartfelt Love Sentiments Stamp Set
HCD1 – 7160 Banners of Love Die
HCD1 – 7161 Sweetheart Border Die
HCPC – 3803 Banners of Love Stamp Set
HCD1 – 7163 Gift of Love Box Die
HCD1-7162 - Eyelet Hearts Die
159723, Designer Dries clear Adhesive
352854, Glue Tips - Metal
HCCC2-451, 8.5 x 11 Cardstock - White
HCDA1-450Stack and Store Daubers- Pack of 6


Thinking Of You!

Hello friends, Welcome to another Wednesday with some creative projects. We have debuted the Singing in the Rain collection this month and we have loads of inspiration to share with you all.

Its a fun, witty and cute collection with some colored boots and Garden Fairies. I have a Tall Slim card for you all to share.


Supplies

HCD1-7169 Rain Boots and Blossoms Die
HCPC-3809 Singing in the Rain Cling Stamp Set
HCPC-3812 Raindrop Sentiments Cling Stamp Set
HCDP1-286 Singing in the Rain Paper Collection
HCD1 – 7161 Sweetheart Borders Die
HCD1-7167 Singing in the Rain Die
HCD1-7168 Songs of Spring Die
HCPC-3812 Raindrop Sentiments Cling Stamp Set
HCBC1 – 456 – 2 Card Shadow Box – White
HCPC-3810 Songs of Spring Cling Stamp Set
HCPP1-438-2 Paper Pack of 10 - White
159723, Designer Dries clear Adhesive
352854, Glue Tips - Metal
HCDA1-450Stack and Store Daubers- Pack of 6

Others: Zig Brushes, Archival Ink (Black,Pink ) , glue gun,  Foam tape, double sided tape, mini mister,. Sizzix, Trimmer, Zig brushes

Instructions

The final card measures 7”x4.5”.Start by taking a white card stock and fold it to form the card base. Cut 2 pattern paper with 1/8” less and adhere to the card base.  Stamp and die cut a piece of the fairy image using black archival ink from the stamp and color it using the zig color brushes. Stamp and die cut several pieces of filler leaves and color all using zig brushes.On the card base adhere the fairy image and adhere it using a foam glue. On the pattern paper stamp the rain drops using a blue distress ink. Once the fairy is placed at the center , arrange all the filler leaves at the side.Arrange a twig with the bird at the top. Stamp the sentiment Thinking of you using pink archival ink and place it at the top. Fussy cut a flag shape pattern paper on which stamp the sentiment.


Wednesday, January 10, 2018

Debuting Singing in the Rain Collection!

Hello friends, its time for the new collection, a brand new release and yes its the very release for 2018 at Heartfelt Creations.

New year brings in new beginnings , fresh new bloom and with this new collection it finally a farewell to the chilly winter breeze and welcoming the spring, This collection features spring rain showers, rain boots and umbrellas, twittering birds and first spring bloom,In this collection we also get to see some pretty garden fairies wearing the colorful boots enjoying the shower.Hence lets unfold the collection , pick up your glossy boots and welcome spring with the Singing in the rain collection!


Instructions

The final card measures 7”x3.5”.Start by taking a white card stock and fold it to form the card base. Cut 2 pattern paper with 1/8” less and adhere to the card base. Take a white shadow box, fold it and then adhere pattern paper to top of the shadow box. On the inner side line up die cut pieces of sweat heart border die .Stamp and die cut a piece of boot from the stamp and color it using the zig color brushes. Stamp and die cut several pieces of filler leaves to tuck in to the boots. On the card base adhere the shadow box using a foam base at 1/4th position of the landscape card.Arrange the boot on top of the shadow box and tuck in all the leaves and filler flowers into the boots. On the other end of the card stick some colored leaves and birds with the branches. Finish the card by adding a sentiment from the paper collection.

Supplies

HCD1-7169 Rain Boots and Blossoms Die
HCPC-3809 Singing in the Rain Cling Stamp Set
HCPC-3812 Raindrop Sentiments Cling Stamp Set
HCDP1-286 Singing in the Rain Paper Collection
HCD1 – 7161 Sweetheart Borders Die
HCBC1 – 456 – 2 Card Shadow Box – White
HCD1-7168 Songs of Spring Die
HCPC-3810 Songs of Spring Cling Stamp Set
HCPP1-438-2 Paper Pack of 10 - White
159723, Designer Dries clear Adhesive
352854, Glue Tips - Metal
HCDA1-450Stack and Store Daubers- Pack of 6

Other Products

Archival Ink (Black ) , glue gun,  Foam tape, double sided tape, mini mister,. Sizzix, Trimmer, Zig Brushes.

Monday, January 8, 2018

A Treat for You!

Hello friends, back with a new card on my blog! Its a new supply that I have tried today, have been wanting to play with mft stamps for a long time. I am playing the sketch for this week at Sketch 366.


Its the Puppy Pals set from Mft and the puppies are extremely cute. Below is the sketch I was inspired to make this card. Entering the card in the weekly challenge.

Do share how you like it and I will be back with some more fun new projects.


Entering in Mft Sketch 366

Thursday, January 4, 2018

Welcome 2018!

Hello friends, this is my first project for 2018 and its with happy heartfelt Wednesday.We are still celebrating Carnations that was debuted this month and here I have 2 versions of it.


Instructions

The final card measures 5.5” x 5.5”. Start by scoring and cutting a white card stock that measures 5.5”x11”, score at 5.5” and create the card base. Cut a 5.3”x5.3” pattern paper from the Paper collection and adhere to the card base. For the front card base take a water color paper which measures 5”x5”.Take any stencil of your choice and create a stencil background using some texture paste. Heat set and sprinkle some water to wet the surface. Later on an acrylic block splash some salty ocean, peacock feather and Broken China distress ink. Use these colors to splash the stenciled background. Once you receive the desired look heat set the surface.Stamp and die cut some large and small Carnation by stamping using Cobalt Archival Ink. Color the flowers using broken china and shape the petals using 3D basic flower shaping molds. Shade the leaves using the crushed olive distress ink. Stamp and die cut some filler leaves using the broken china and cobalt ink and keep it white. 

I have another fridge Magnet using the camellia Carnation which is made using the same collection.


Supplies

HCD1-7164 Small Carnation Die 
HCD1-7129 Large Carnation  Die
HCPC-3806  Small Camelia Carnation Cling Stamp Set
HCPC-3752, Large Camelia Carnation Cling Stamp Set
HCD1- 7161 Sweet heart Border Die
HCPC-3799 Sunflower Accents Stamp Set
HCD1 – 7153 Sunflower Accents Die
HCPC – 3800 Young At heart Cling Stamp
HCD1 – 7159 Simply Classic Die
HCS1 – 459-3 Assorted Bead Stamens – Medium Pearl Stamens Small
HCS1 – 459 – 1 Assorted Bead Stamens – Large
HCFB1 – 464 3D Floral Basics Shaping Tool
HCPP1-438-2 Paper Pack of 10 - White
159723, Designer Dries clear Adhesive
352854, Glue Tips - Metal
HCDA1-450Stack and Store Daubers- Pack of 6